Obsnap Instruments Sdn Bhd
29A, Jalan SS 15/4C, 47500 Subang Jaya, Selangor, Malaysia.
+603-5621 5786
+603-5621 5829
+60122185651 (Enquiry)
+60162233687 (Vacancy)
Sinpo - JVB250 & JVB300
| Previous | 6 / 7 | Next |
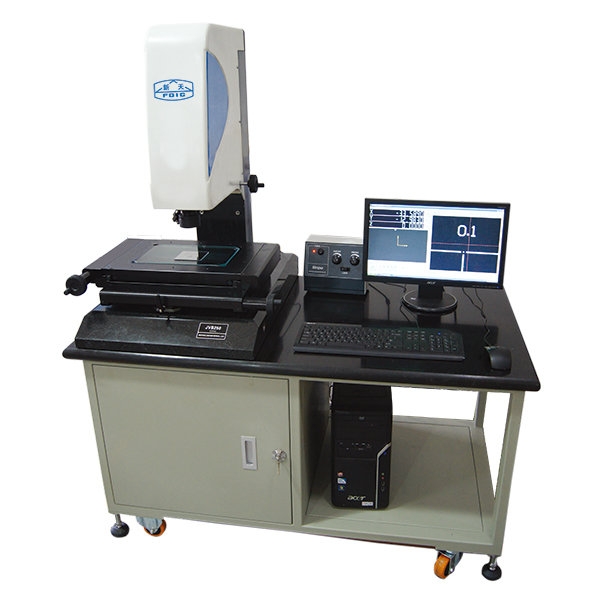
Application
• Manual Video Measuring Machine
• The base and upright column adopt high precision of granite to ensure the stability of the mechanism system
Z axis adopts precision linear guide with clump weight. And the lens is in even force up and down to ensure the precision,
• The laser locating indicator can rapidly find the measuring position of workpieces.
0.7X ~ 4.5X Step-zoom lens,
• The grating scales that mounted on X axis and Y axis can make sure the high locating precision. Z axis when mounted with grating scale can measure height of workpieces.
Features
Basic function of the software:
• Basic geometry measurement: Point, line, circle, arc, ellipse, rectangle and curves.
• Powerful measurement: Automatically find the best boundary point, automatically measure and identify line, circle and arc, can select the point, line, circle, arcs and ellipse with frame, can collect point manually through a mouse.
• Combination measurement: Combine the point, line and circle and calculate the distance, angle and intersection point among points, lines and circles.
• Geometrical error measurement: Measure the parallelism, perpendicularity, inclination, displacement, coxiality and symmetry.
• Coordinate system setting: Parallelly move, rotate and change the original coordinate or reset the coordinate system.
• Dimension annotation: It can mark the length, angle, radius and diameter on the drawing window conveniently just like using AUTOCAD software.
• Inspection result output: The drawings and measuring results can be put out in the format of WORD, EXCEL, DXT.
• Auto focusing function: It can produce a focusing indicating curve by adjusting Z axis and then judge optimum focus distance position so as to reduce focusing error from operator.
Enlarge small window function: It can partly enlarge the vision window through the small window on the lower right corner of software so as to accurately aim at the workpiece.
• CAD window: Special CAD window has the same idea as three coordinates, which make customer vividly understand the testpieces.
• SPC function: Data statistics report can be edited frreely according to user's measuring requirements.
• Teaching function: User only need to program the measuring path one time when measuring batch parts, and set the number of measuring times to automatically complete the measurement. (The function is only for CNC type).
Technical Specification
| Model | JVB250 | JVB300 | JVB 400 |
| (X/Y/Z)Measuring table (mm) | 250*150*200 | 300*200*200 | 400*300*200 |
| Overall dimension | 1000*650*1650 | 1000*650*1650 | 1000*650*1650 |
| Wortable load capacity | 30kg | 30kg | 30kg |
| Precision Of X and Y | (3+L/200)μm | (3+L/200)μm | (3+L/200)μm |
| Repeatability | 2μm | 2μm | 2μm |
| Resolution of grating scale | 0.5μm | 0.5μm | 0.5μm |
| CCD | 1/3″ 430,000 pixel color CCd | 1/3″ 430,000 pixel color CCd | 1/3″ 430,000 pixel color CCd |
| Magnification | Optical:0.7-4.5X, Image;28-180X | Optical:0.7-4.5X, Image;28-180X | Optical:0.7-4.5X, Image;28-180X |
| Light source | light source LED | light source LED | light source LED |
| Operating mode | Manual | Manual | Manual |


